Practical 7: Perform an operation of operating system to configure Internet Protocol
2024, February 28
In this practical, we will demonstrate how to configure the Internet Protocol (IP) settings on Kali Linux. The process involves setting up a static IP address, subnet mask, and default gateway to establish a stable and predictable network environment. This is crucial for network management, troubleshooting, and ensuring consistent network performance.
Internet Protocol (IP) configuration involves setting up IP addresses, subnet masks, default gateways, and DNS servers. IP addresses identify each device on a network, subnet masks define network boundaries, and default gateways enable devices to communicate with external networks.
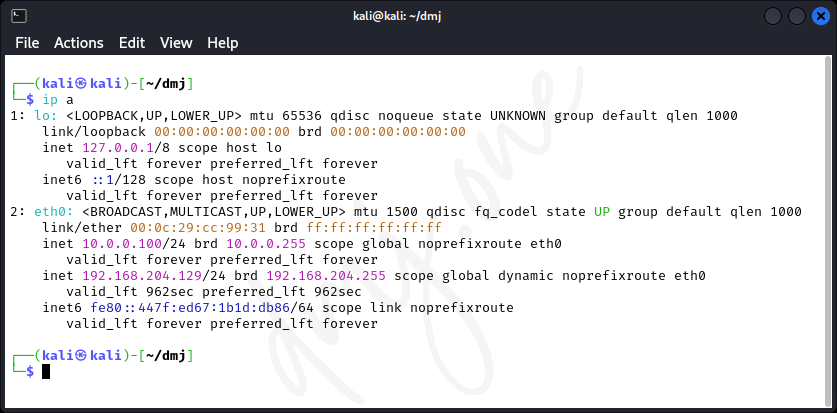
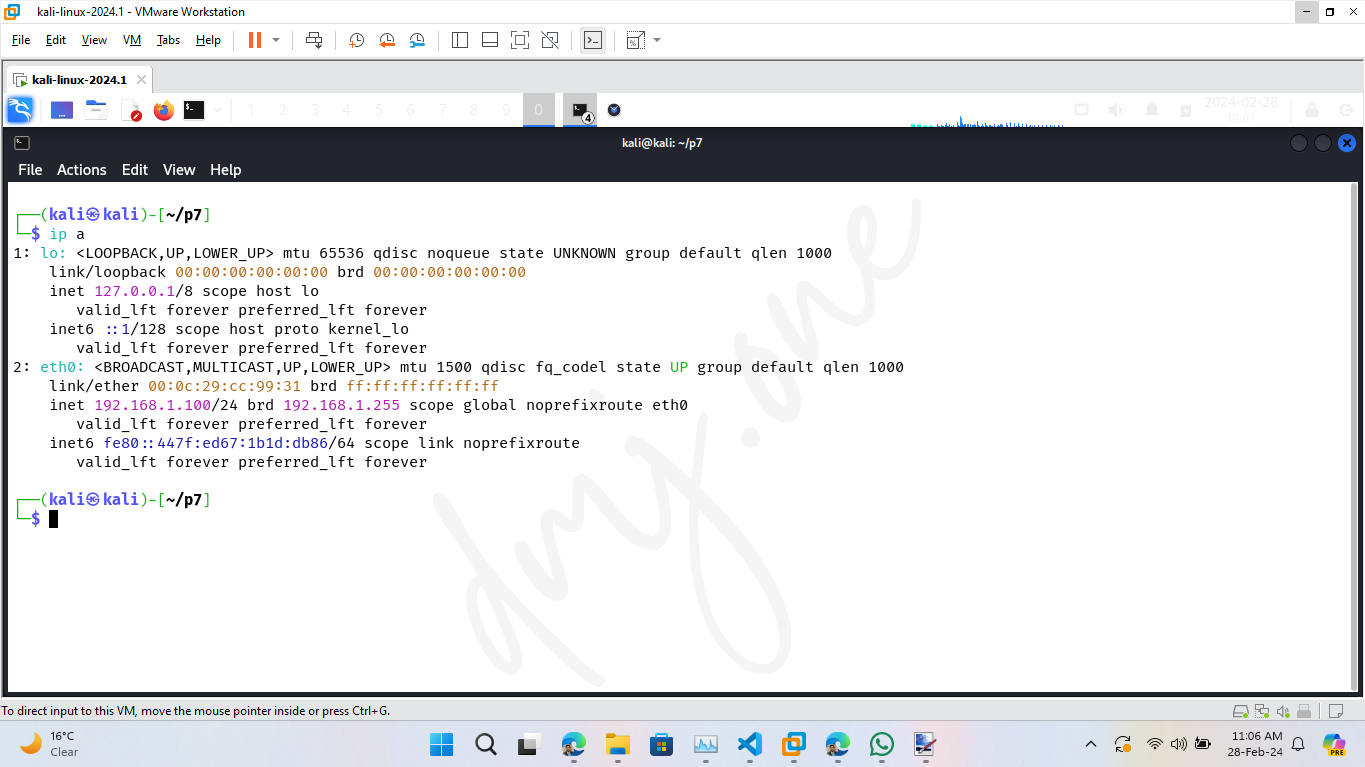
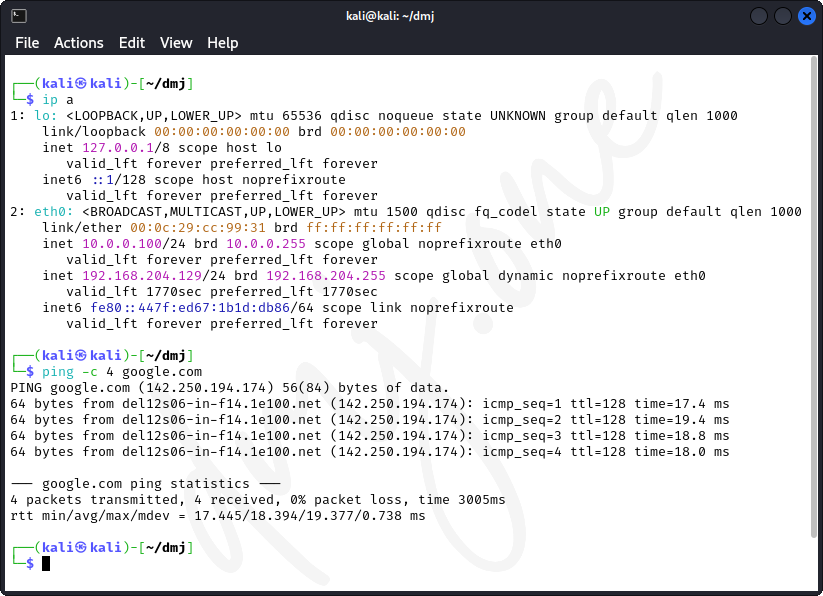
Before configuring a new IP address, it's important to check the current settings. This can be done using the ip command.
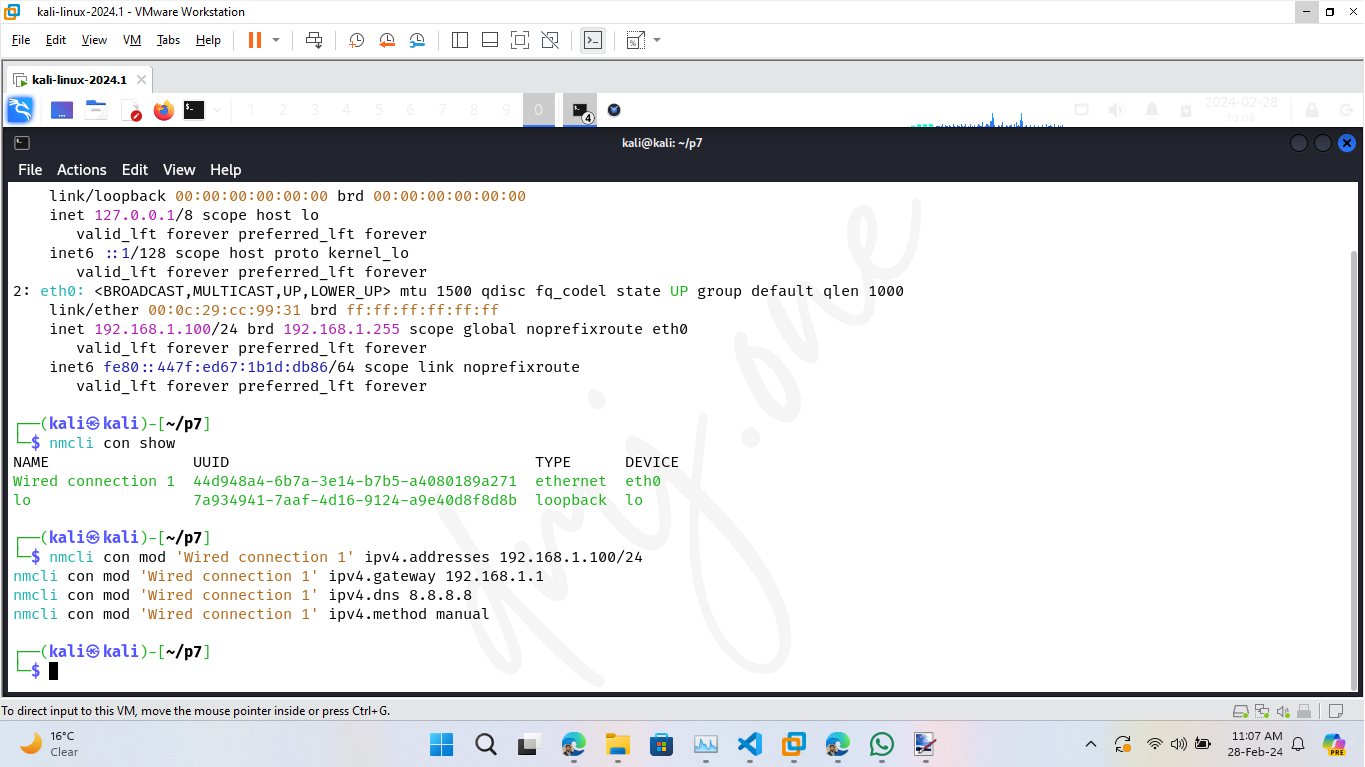
ip aThis command displays all current network interfaces and their IP configuration.
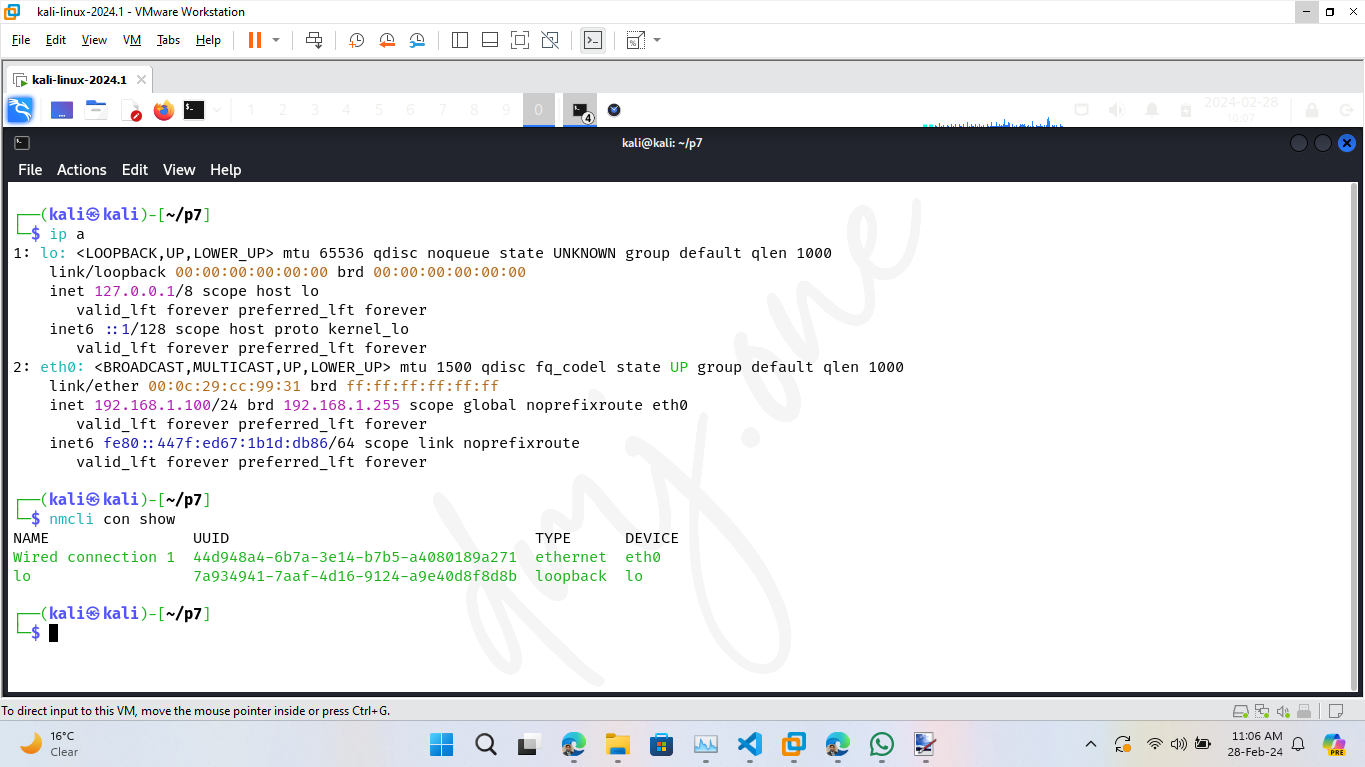
To configure a static IP address, you need to edit the network configuration file. In Kali Linux, this is typically handled by the NetworkManager.
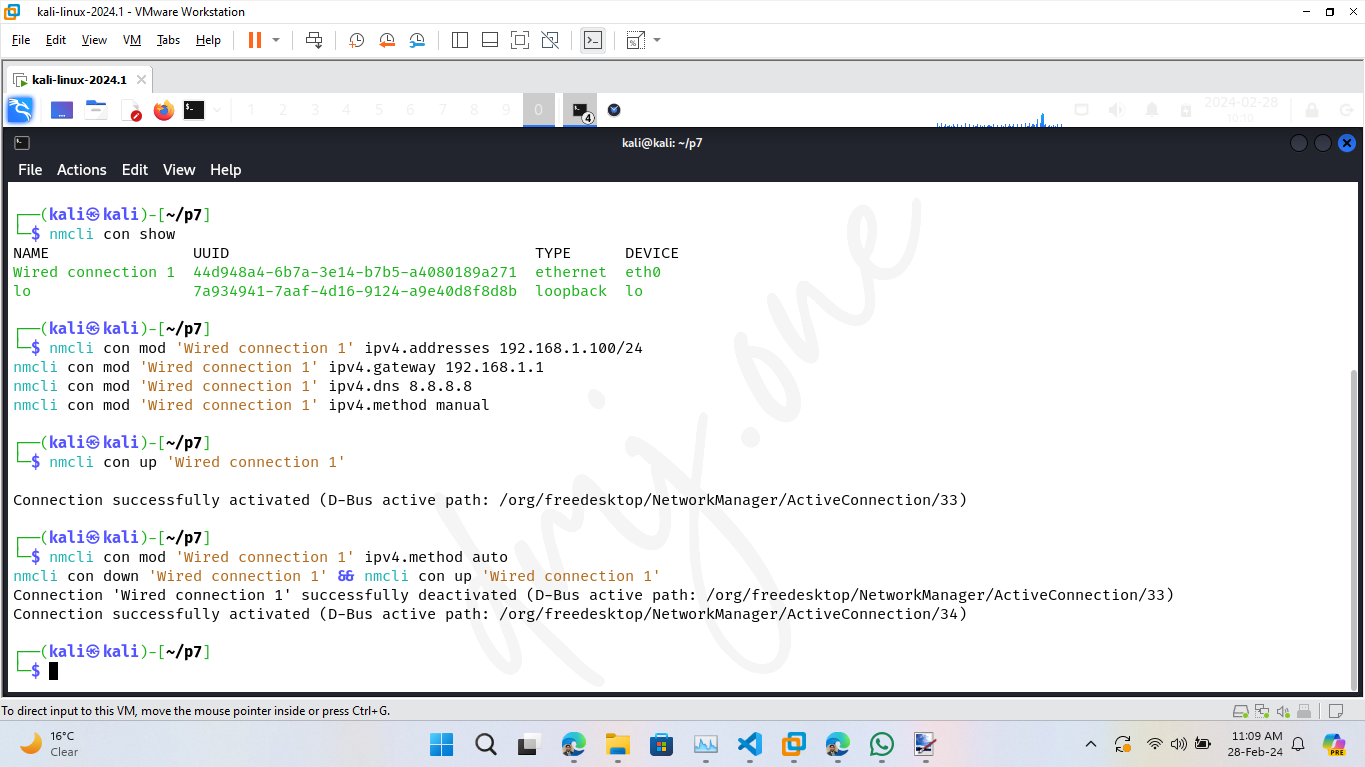
First, identify the connection name using:
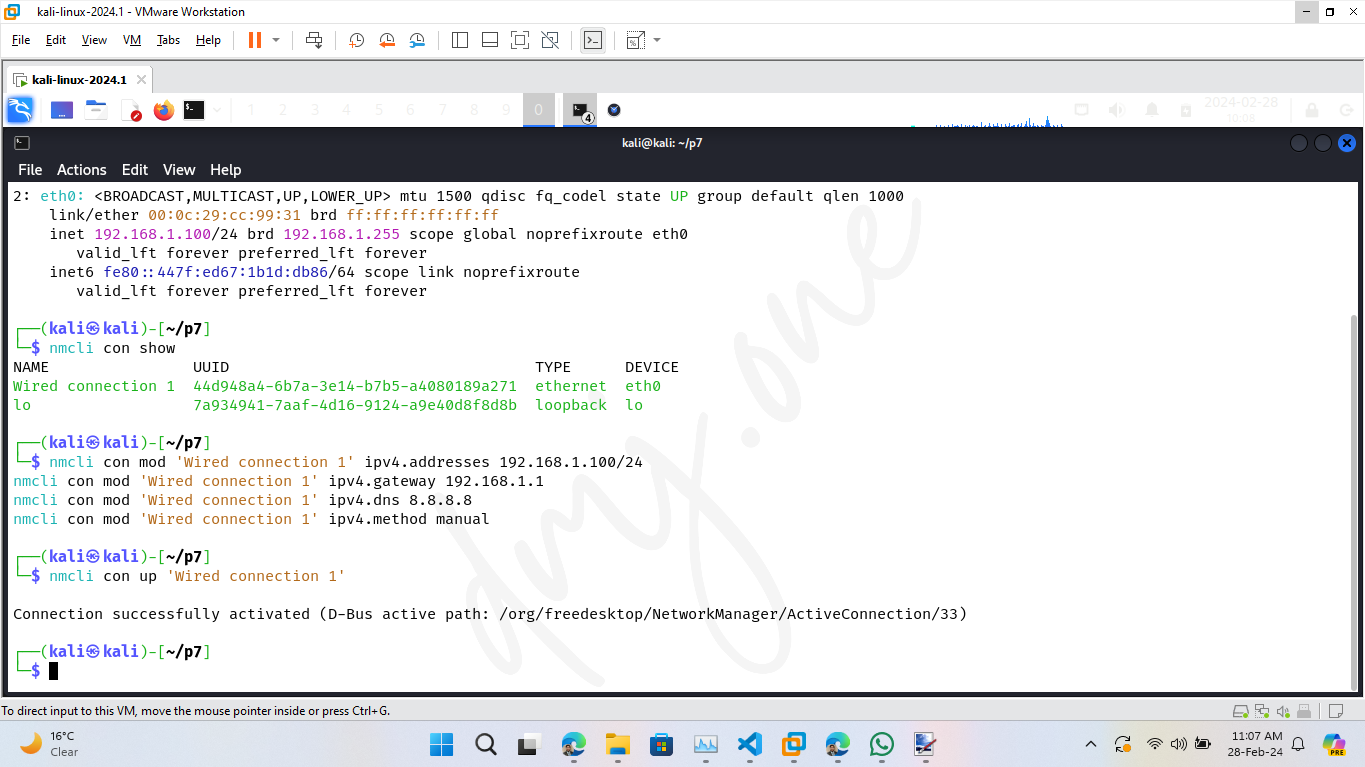
nmcli con show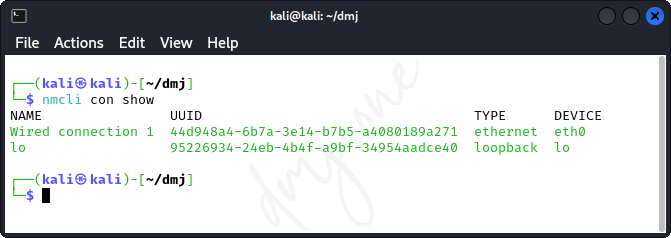
Then, modify the connection settings for your specific network interface (replace "eth0" with your interface name and adjust the IP details accordingly):
nmcli con mod 'Wired connection 1' ipv4.addresses 192.168.1.100/24
nmcli con mod 'Wired connection 1' ipv4.gateway 192.168.1.1
nmcli con mod 'Wired connection 1' ipv4.dns 8.8.8.8
nmcli con mod 'Wired connection 1' ipv4.method manual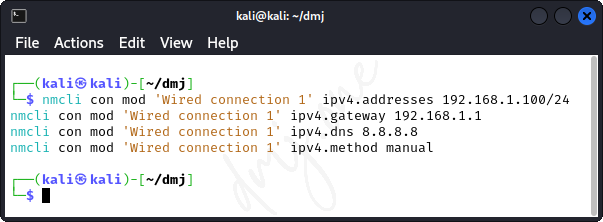
After configuring the settings, reactivate the connection:
nmcli con up 'Wired connection 1'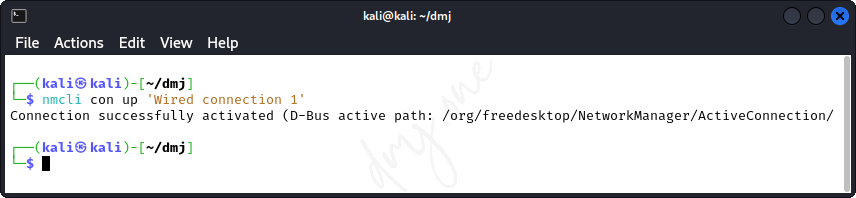
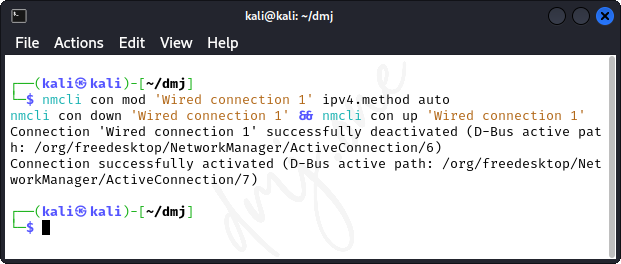
To revert back to automatic run this:
nmcli con mod 'Wired connection 1' ipv4.method auto
nmcli con down 'Wired connection 1' && nmcli con up 'Wired connection 1'
After setting up the static IP, verify that the configuration is correct and the network is operational:
ip a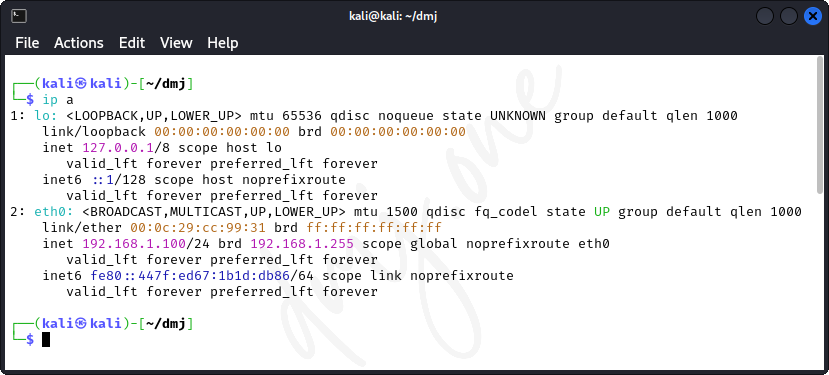
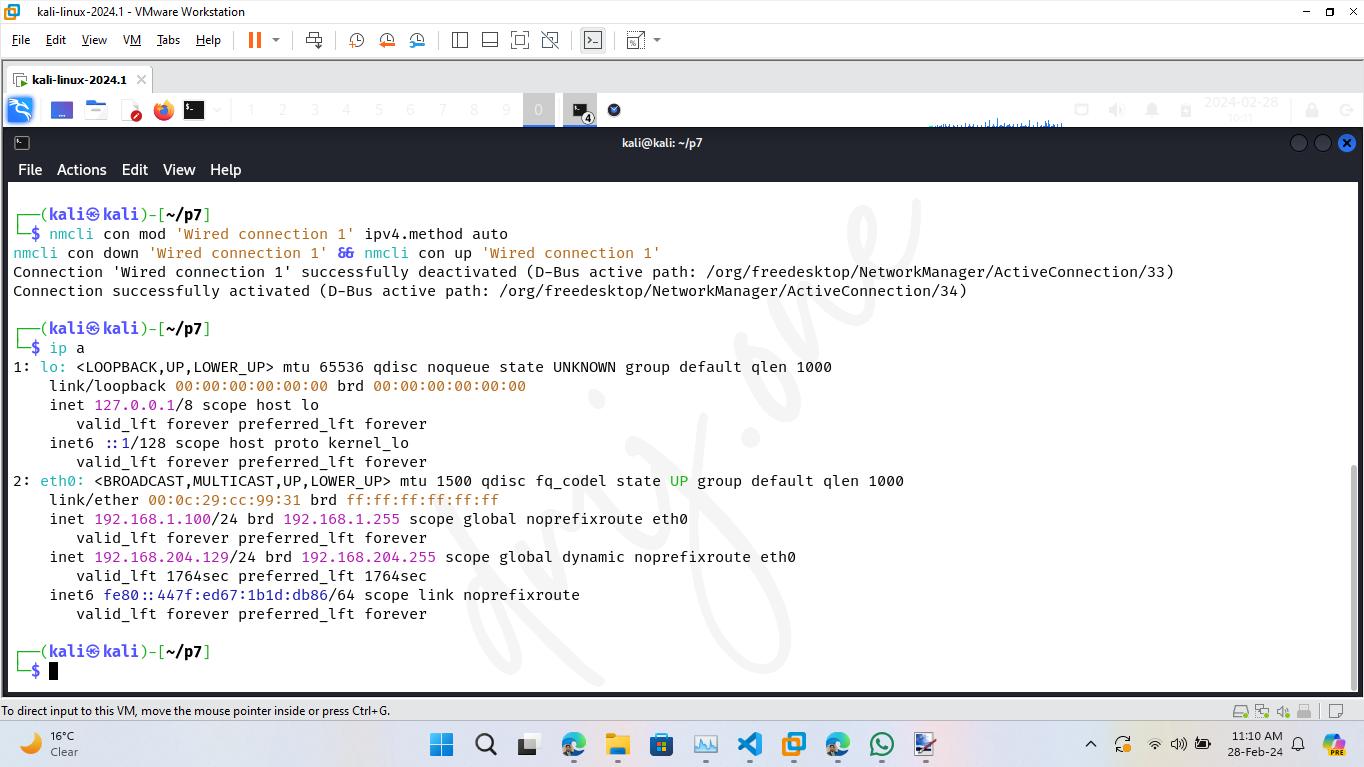
Check if the IP address, subnet mask, and default gateway are correctly assigned as per your configuration. Additionally, test network connectivity:
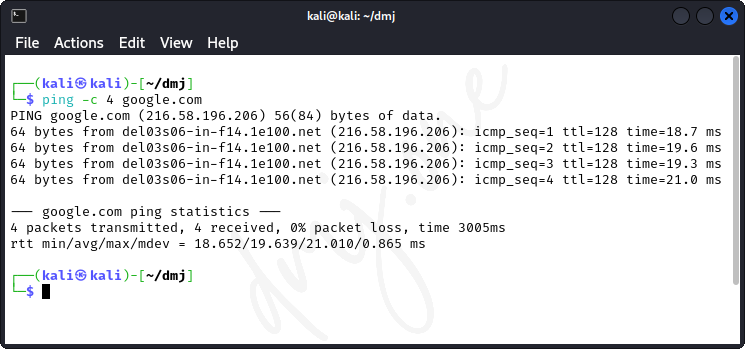
ping -c 4 google.comThis command tests connectivity to the internet by sending packets to Google's servers.
Assuming the current IP address is in Class C (e.g., 192.168.1.100), we will change it to a Class A address (e.g., 10.0.0.100) but with the same subnet mask of 255.255.255.0.
First, ensure the Network Manager service is active:
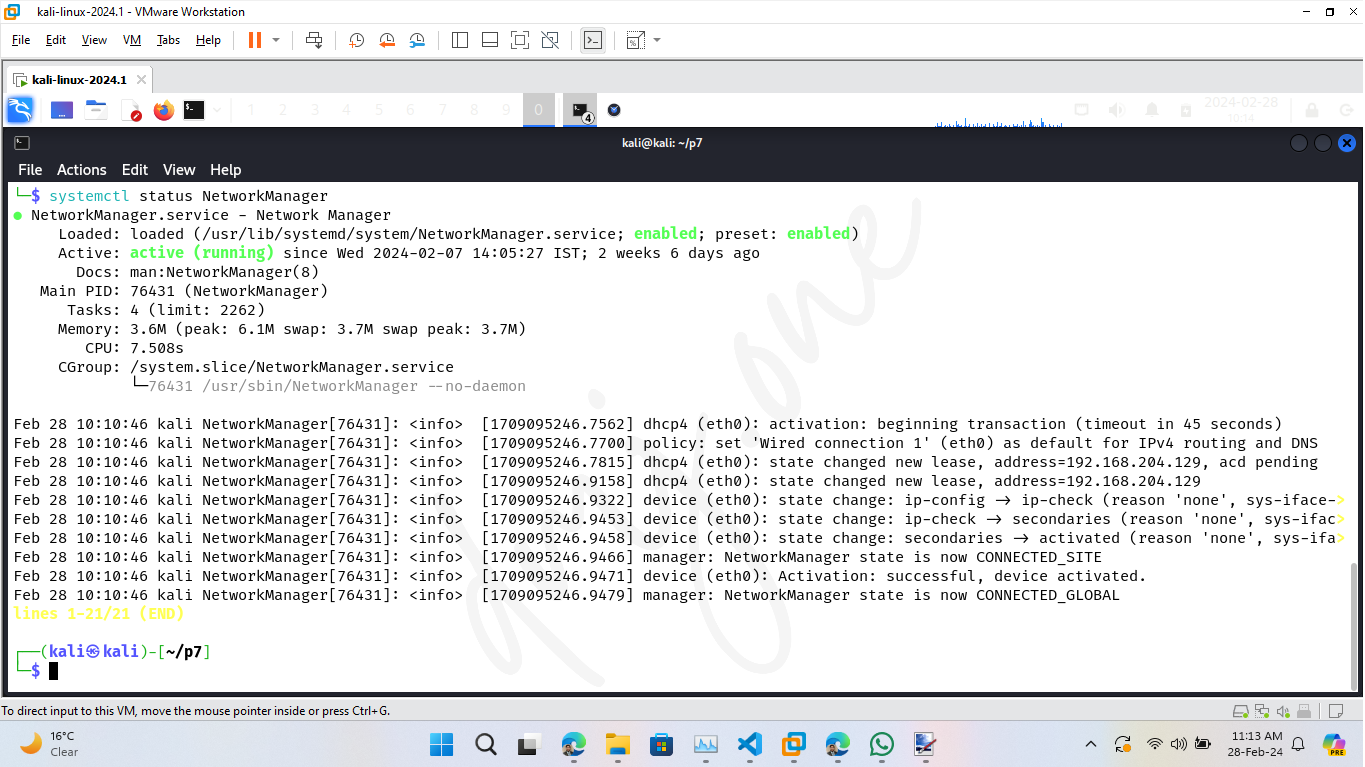
systemctl status NetworkManager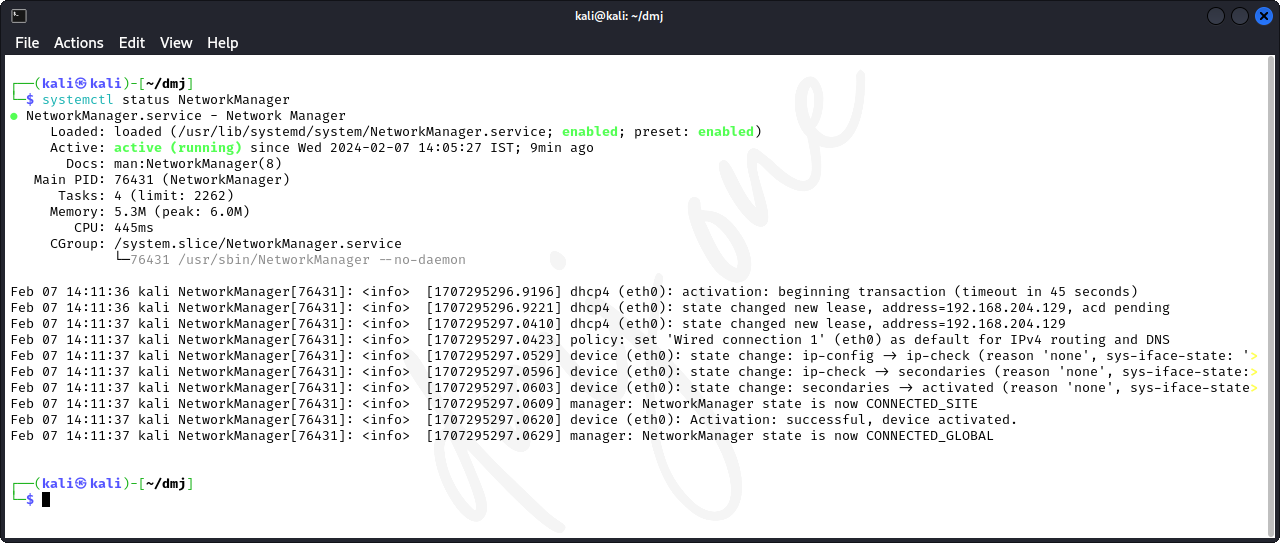
If the service is not running, start it using:
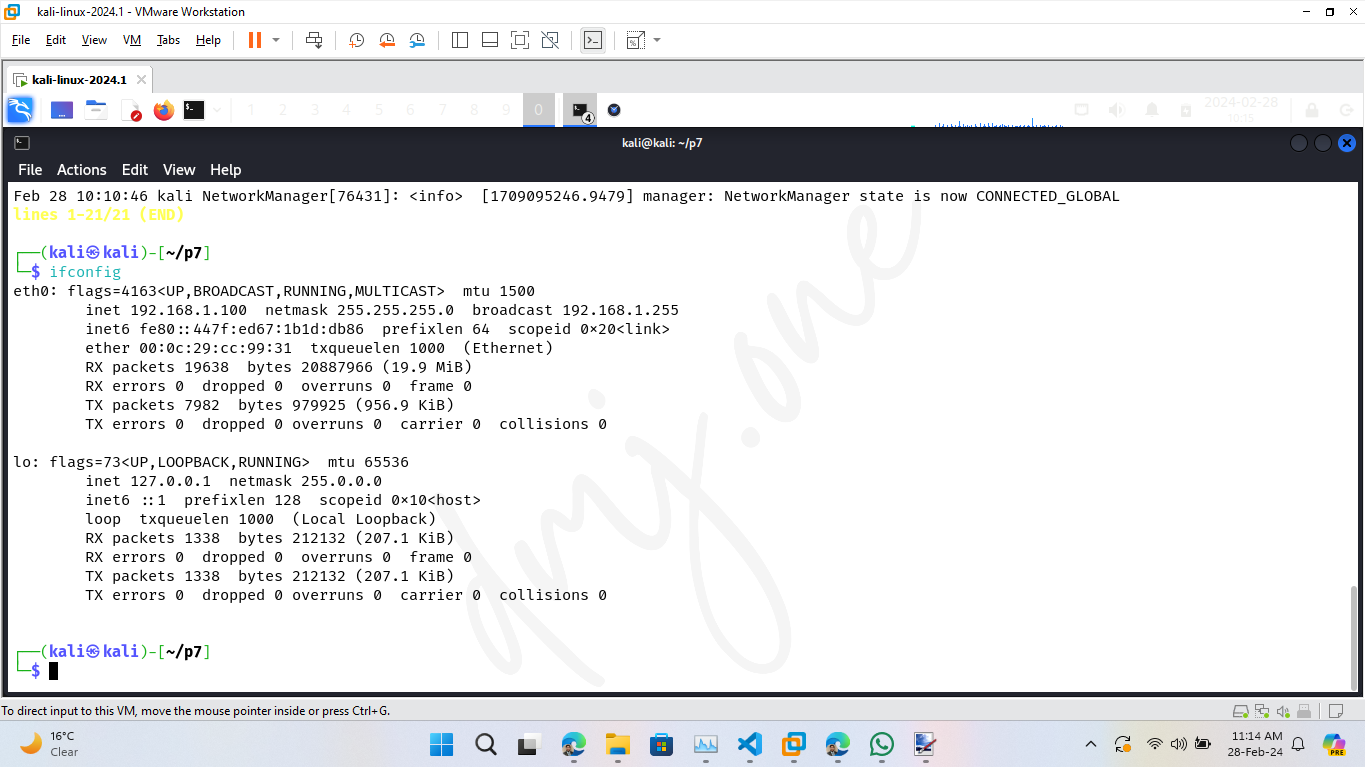
systemctl start NetworkManagerThen, get the current ip address to verify the IP class change:
ifconfig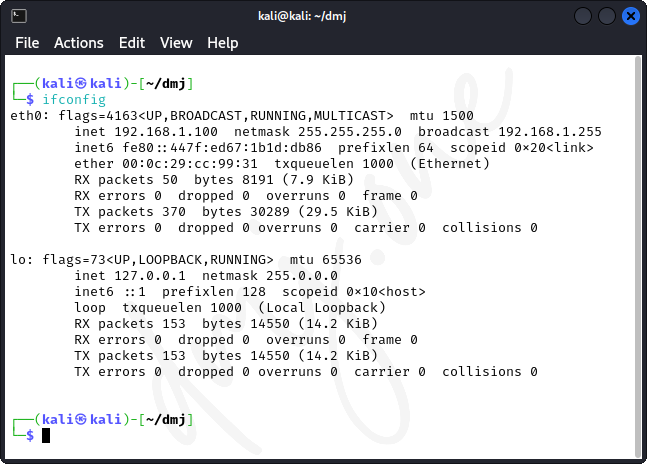
Then, modify the IP configuration:
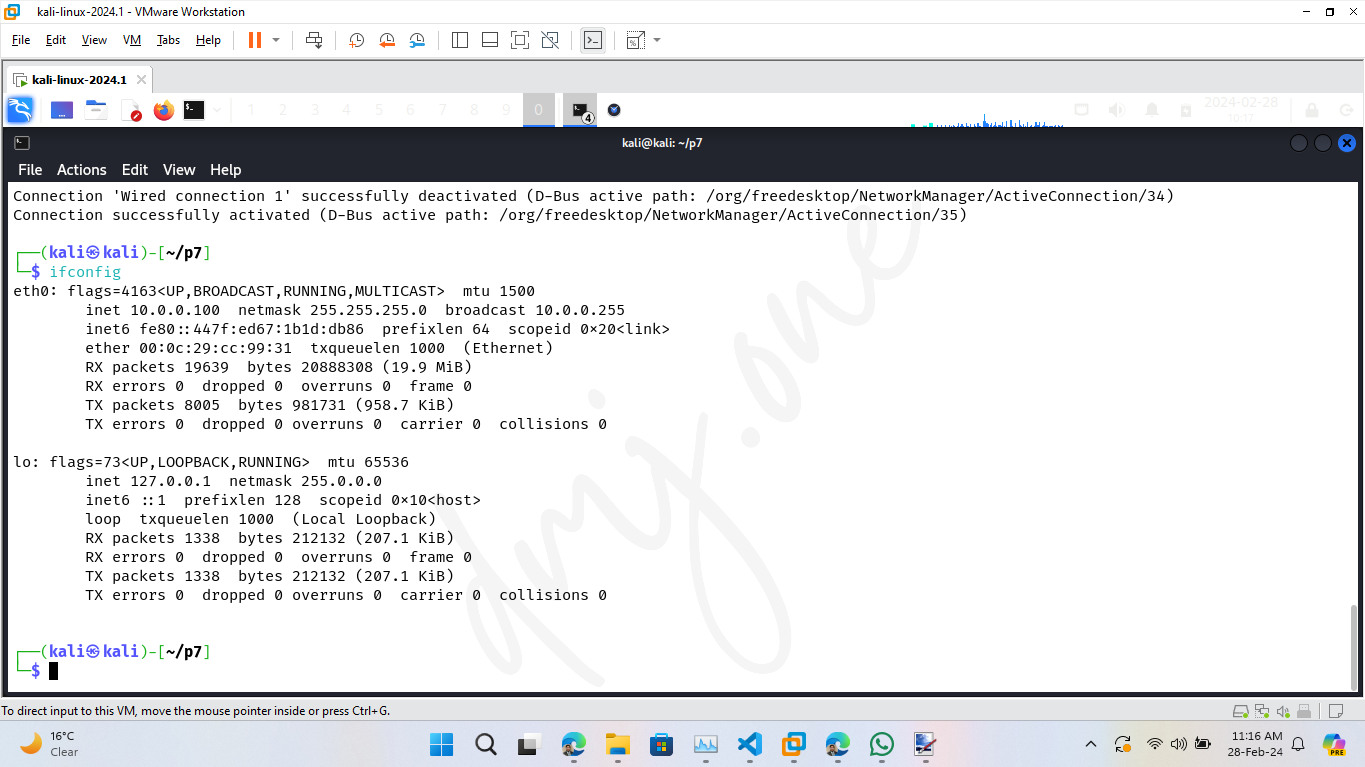
nmcli con mod "Wired connection 1" ipv4.addresses 10.0.0.100/24 # Apply Changes
nmcli con down "Wired connection 1" && nmcli con up "Wired connection 1" # Restart Adapter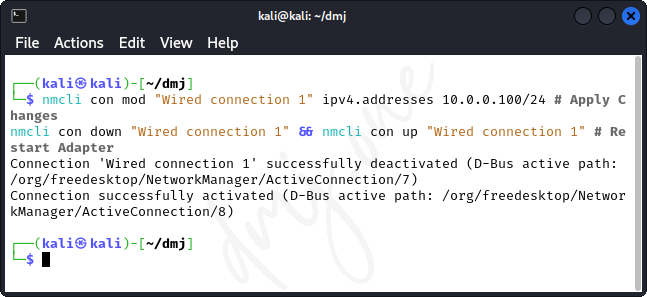
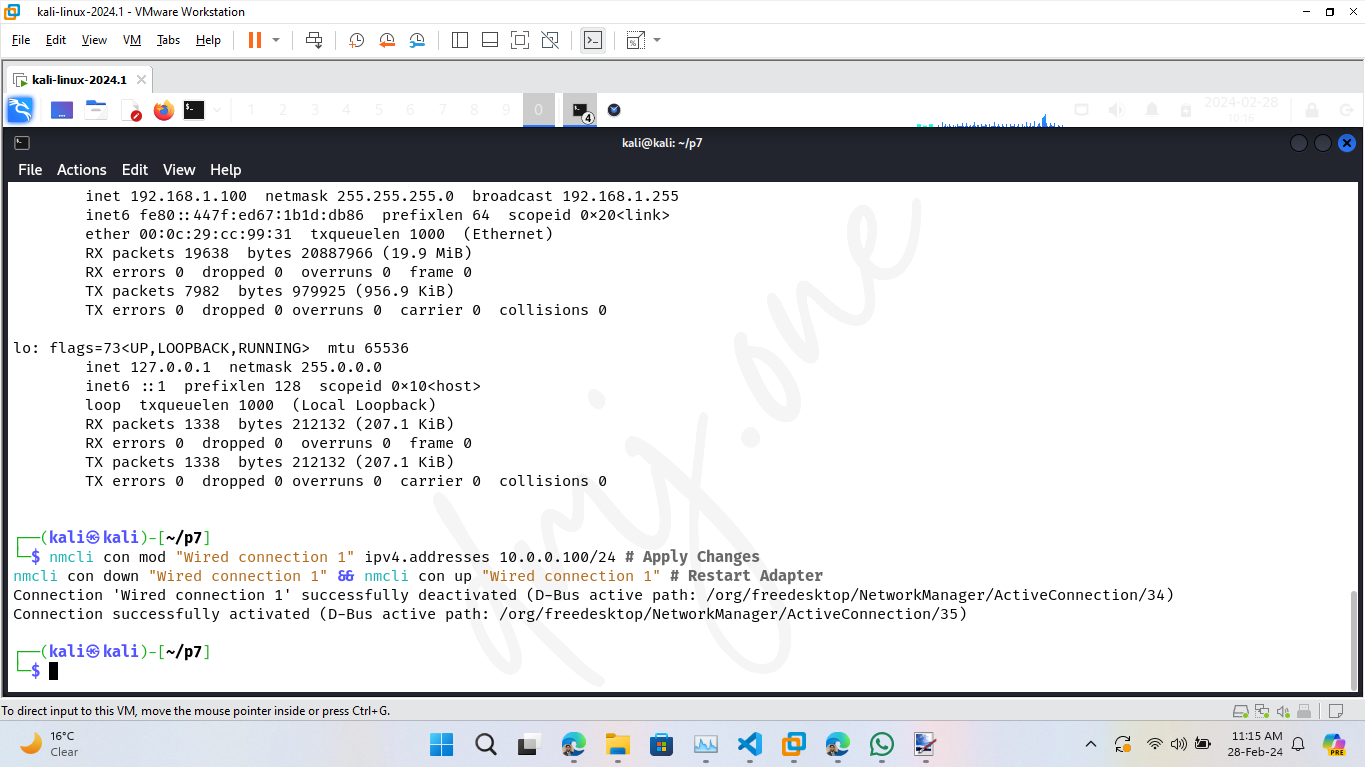
This command changes the IP address and reactivates the network connection to apply changes.
Then, Verify the IP class change:
ifconfig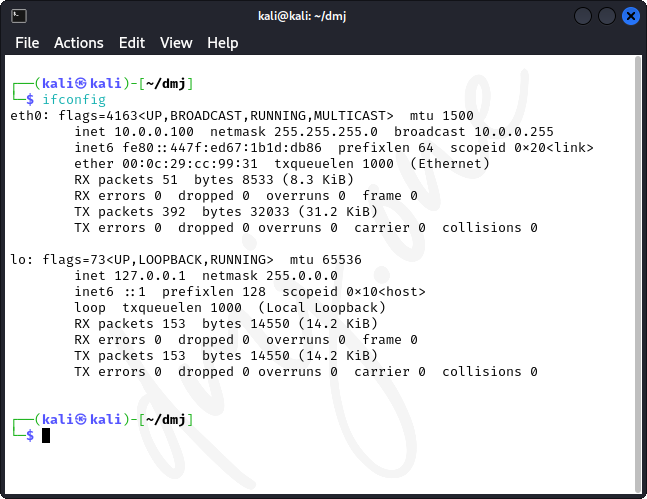
Optionally, to revert back to automatic settings, run these:
nmcli con mod "Wired connection 1" ipv4.method auto # Revert Changes and set to auto
nmcli con down "Wired connection 1" && nmcli con up "Wired connection 1" # Restart AdapterAfter updating the IP address, verify that the new configuration is applied correctly:
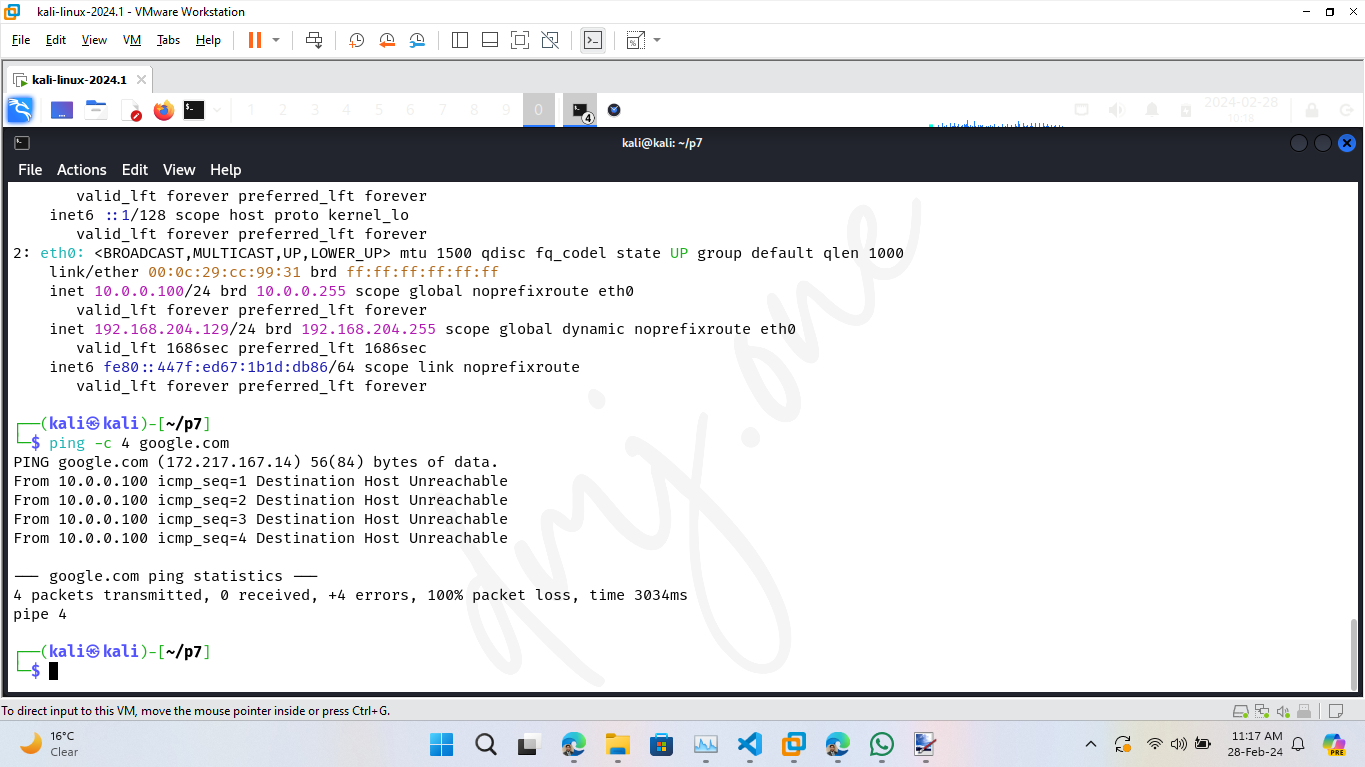
ip aLook for the interface "eth0" to see if the IP "10.0.0.100" with the subnet "255.255.255.0" is correctly assigned. Also, ensure the network connectivity is intact:
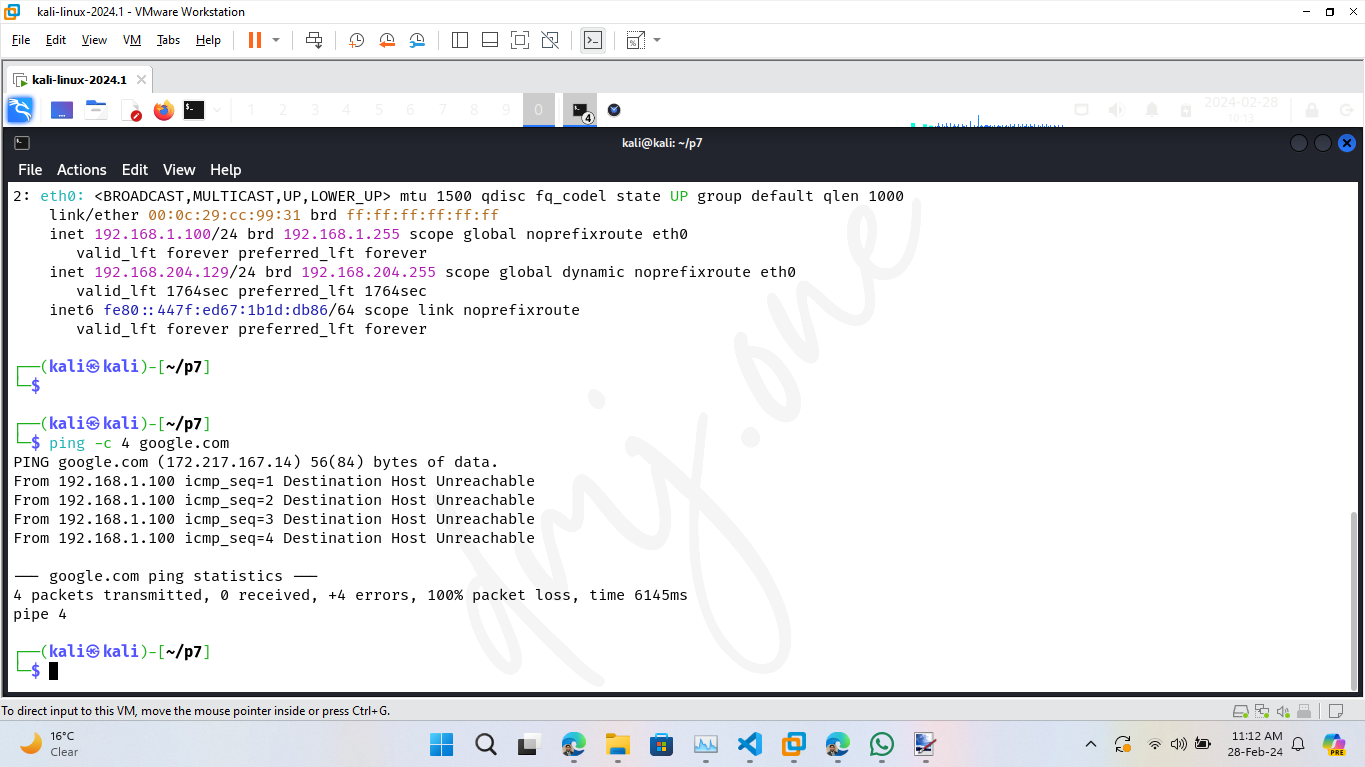
ping -c 4 google.comThis command checks the reachability of Google's servers, confirming that the network interface is functioning properly with the new IP class.
Alternatively, to change the IP address using the older ifconfig command, you would first need to determine your network interface name and then use the following commands to update the IP settings:
sudo ifconfig eth0 10.0.0.101 netmask 255.255.255.0This command sets a new IP address while maintaining the same subnet mask on the specified interface. Verify the update by using:
ifconfig eth0Ensure that the IP address has been changed as expected and test connectivity:
ping -c 4 google.comThis will confirm the network's functionality with the newly assigned IP address.